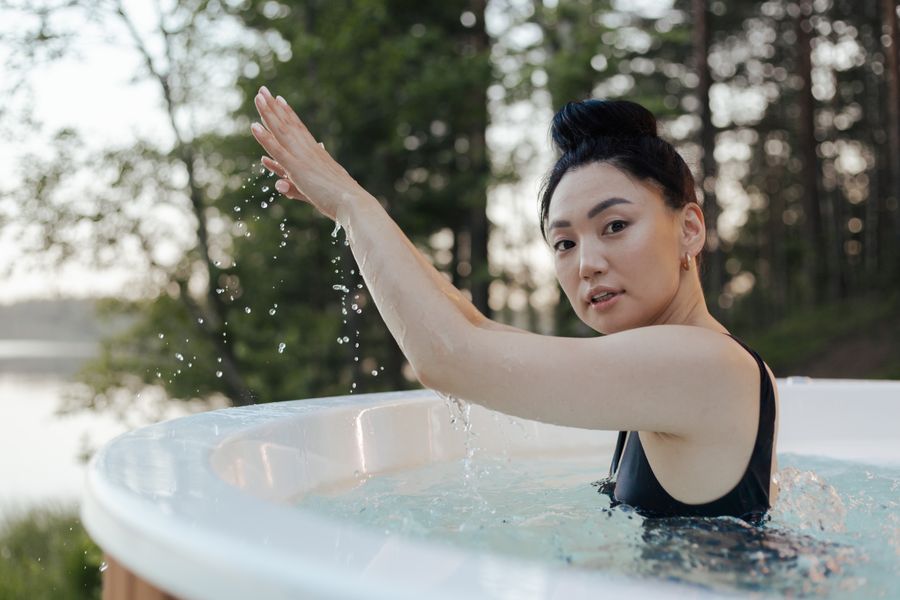
Cold plunging has moved firmly from gym-only territory into home practice — but most guides assume you have a backyard, a garage, or at minimum a dedicated utility space. Apartment dwellers face real constraints: limited floor space, drainage logistics, floor load limits, landlord rules, and the practical question of where you're going to store a tub when you're not using it.
The good news: all of these constraints are solvable. The cold plunge market in 2026 includes options specifically designed for compact living, and the DIY chest freezer approach needs nothing more than a 110V outlet and a bathroom nearby. This guide breaks down every apartment-viable approach, compares the real ongoing costs, and covers the logistics that most guides skip entirely.
4 Apartment-Friendly Approaches
Each approach involves different trade-offs between upfront cost, ongoing cost, convenience, storage, and temperature precision. Here's the honest breakdown:
Approach 1: Inflatable Cold Plunge Tub
Best for: Minimal commitment, limited storage, budget-conscious starters
Examples: Cold Pod ($100–$160), Ice Barrel Portable, ColdLife Inflatable
Pros: Stores flat, no drilling, no permanent installation, can be set up in any room with drainage nearby
Cons: Ice required every session (adds $15–30/use), not insulated for prolonged temperature holding, less durable than hard-sided options
Inflatable tubs are the gateway option. They hold 80–100 gallons, fit an adult comfortably seated, and pack down to the size of a duffel bag. The Cold Pod — consistently the best-selling inflatable in this category — uses a reinforced PVC outer shell with an insulated inner liner that holds temperature for 2–4 hours with ice. For a beginner building a habit, this is the lowest-friction starting point.
The limitation is ongoing cost. Ice adds up fast — see the Ice vs. Chiller Economics section for exact numbers.
Approach 2: Foldable/Portable Hard-Sided Tubs
Best for: Regular use with better temperature holding, moderate storage constraints
Examples: Edge Theory Labs Ground Tub ($280–$320), Polar Monkeys ($250–$350)
Pros: Better insulation than inflatable, folds flat, accepts a chiller for temperature-controlled use
Cons: Heavier and bulkier than inflatables when folded, still requires ice or a chiller for consistent cold
The Edge Theory Labs Ground Tub is the standout in this category. It's a reinforced insulated tub with a drain valve, chiller port, and a foam floor pad. When not in use, it folds to a 6-inch stack. For apartment dwellers who want to add a chiller unit later, this is the most upgrade-friendly option under $400.
Approach 3: Stock Tank (Balcony Setup)
Best for: Those with a decent-sized balcony and willingness to haul ice occasionally
Examples: 100-gallon galvanized steel stock tank (~$150–$200), Rubbermaid 100-gallon agricultural tank (~$200)
Pros: Extremely durable, large enough for full recline in smaller models, outdoor placement handles water spillage naturally
Cons: Heavy (830+ lbs filled), outdoor exposure means temperature varies with ambient weather, balcony approval needed
Stock tanks are a classic cold plunge vessel. A 100-gallon galvanized steel tank is 50" L × 24" W × 24" D — fits on most standard balconies and is wide enough for comfortable use. In cold months, no ice or chiller is needed: ambient temperatures naturally maintain 40–55°F, which is ideal. In summer, the galvanized steel heats up quickly and you'll need significant ice (30–40 lbs per session) or a chiller.
For comparison to commercial cold plunge tubs, stock tanks offer the largest usable volume per dollar by a significant margin — the tradeoff is aesthetics and temperature control.
Approach 4: Chest Freezer Conversion
Best for: Year-round daily use at precise temperatures, dedicated space (corner of a room or balcony)
Estimated cost: $120–$350 total build
Pros: Maintains precise temperature automatically, no ice ever needed, cheapest per-session cost over time
Cons: Requires permanent placement (can't be packed away), 110V outlet needed, requires a temperature controller build
A used chest freezer (7–10 cu ft) plus an Inkbird temperature controller is arguably the best cold plunge setup for serious apartment practitioners. It plugs into a standard 110V outlet — no special electrical work required — and maintains any temperature from 34°F to 70°F automatically. The total footprint is roughly 24" × 48", about the size of a small appliance. See our full guide to best cold plunge options under $500 for more budget-focused comparisons.

Top Picks by Budget
Under $200: Best Starter Setup
Pick: Cold Pod Inflatable Tub (~$130) + First Month of Ice
The Cold Pod is the most practical entry point for apartment cold plunging in 2026. It ships compressed, inflates in 5 minutes, holds a seated adult (up to 6'6"), and deflates back into a carry bag that fits under a bed or in a closet. Insulation is decent — better than a stock pot, worse than a chest freezer — and holds temperature for 2–4 hours with a proper ice load.
Setup: fill with cold tap water, add 20–25 lbs of ice, wait 30–40 minutes, plunge. Drain after use into a bathtub using the included drain valve. Total setup to first plunge: under 1 hour.
The Cold Pod isn't a long-term solution if you're plunging 4–5 times per week — ice costs will exceed the tub's purchase price within 2–3 months. But for testing whether cold plunging is a habit worth investing in, it's ideal.
$200–$400: The Upgrade Path
Pick: Edge Theory Labs Ground Tub (~$300) or 10 cu ft Chest Freezer + Controller (~$150–$250)
At this budget, you're choosing between portability (Ground Tub) and temperature precision (chest freezer). The Ground Tub is better if you might move, share the space, or want the option to take it to a friend's place. The chest freezer is better if you're committed to the practice and want to eliminate ice purchasing forever.
The chest freezer conversion at this budget range typically uses a refurbished unit from Facebook Marketplace ($60–$100) plus an Inkbird ITC-308 controller ($35) and a submersible pump ($25). Total: ~$120–$160. This is genuinely one of the best value setups in cold therapy regardless of living situation.
$400–$800: Chiller + Tub Combo
Pick: Polar Monkeys or Edge Theory Ground Tub + Penguin Chiller or similar chiller unit
At this budget, you can pair a quality foldable tub with a standalone chiller unit. Aquarium chillers (Penguin, Hailea) in the 1/10 HP range cost $300–$500 and cool 80–120 gallons to your target temperature without ice. This setup is quieter and more aesthetically polished than a chest freezer, though it costs more and has a larger ongoing electricity footprint due to the separate chiller pump running continuously.
Best for: renters who want a portable setup (move-friendly) that doesn't look like industrial equipment.
Managing Drainage in an Apartment
Drainage is the most common apartment cold plunge problem that no one talks about upfront. Here are the practical solutions:
Option 1: Bathtub Drain (Best for Most Setups)
Run a garden hose from your tub's drain valve to the bathtub. A standard ¾" garden hose fits most bathtubs without issue and drains 80–100 gallons in 15–25 minutes. You need the tub to be slightly elevated above the bathtub entry height for gravity drainage, or use a small submersible pump ($20–$30) to transfer water upward into the tub.
This works for inflatable tubs, foldable tubs, and stock tanks placed near the bathroom. For stock tanks on balconies, run the hose through a door/window — a 25-foot hose is usually sufficient.
Option 2: Submersible Pump Transfer
A 400 GPH submersible pump drains 100 gallons in approximately 15 minutes and can pump water upward 6–8 feet — enough to reach most bathtubs or utility sinks. Connect a garden hose to the pump outlet and direct it to a drain. This is the most flexible solution and works regardless of your tub's height relative to the drain.
Option 3: Water Change Frequency Reduction
The less often you change water, the less drainage you deal with. Pair an ozone generator or hydrogen peroxide protocol with your cold plunge to extend water changes to every 3–4 weeks. At that frequency, a monthly 30-minute drain operation is the full drainage burden. See the sanitation section in our cold plunge protocol guides for exact schedules.
What to Avoid
- Draining onto your balcony floor — only appropriate if your balcony has a proper floor drain. Pooling water risks seeping through to lower floors.
- Draining large volumes into a toilet — toilets drain slowly (2–3 gallons/minute). Draining 80–100 gallons this way takes 30–50 minutes and risks overflow if anything is partially clogged.
- Pouring large quantities into an apartment building's grey water system without a hose — splashing 50°F water creates condensation and potential slip hazards.
Ice vs. Chiller Economics: 12-Month Cost Breakdown
This is the calculation most cold plunge guides skip. Here's the honest 12-month math for three usage scenarios:
| Scenario | Ice Method (Year 1) | Chiller Method (Year 1) | Freezer Build (Year 1) |
|---|---|---|---|
| Casual (2x/week) | $130 tub + $1,560 ice = $1,690 | $300 tub + $400 chiller + $80 electricity = $780 | $200 build + $60 electricity = $260 |
| Regular (4x/week) | $130 tub + $3,120 ice = $3,250 | $300 tub + $400 chiller + $120 electricity = $820 | $200 build + $80 electricity = $280 |
| Daily | $130 tub + $6,570 ice = $6,700 | $300 tub + $400 chiller + $150 electricity = $850 | $200 build + $100 electricity = $300 |
Ice assumptions: 20–25 lbs per session @ $1.50/lb (convenience store bags; grocery store freezer bags run $0.80–$1.20/lb). Chiller electricity: ~$10–15/month at average US rates. Freezer electricity: ~$6–10/month.
The economics are stark: for anyone plunging more than 2x per week, a chiller or chest freezer build pays off within 2–4 months. Ice makes sense as a temporary method while you're testing the habit — not as a permanent infrastructure decision.
For a comprehensive look at the best value options across all budgets, see our full roundup of best cold plunge tubs in 2026.
Getting Cold Without a Chiller
If you're not ready to invest in a chiller or chest freezer, here are techniques to get your water colder and keep it there longer:
Maximize Ice Efficiency
- Pre-cool with cold tap water: The colder your starting tap water, the less ice you need. Let cold tap water run for 60–90 seconds before filling — this can drop starting temperature 3–5°F in some plumbing systems.
- Use block ice, not cubed: Block ice has less surface area per pound, melts significantly slower, and lasts 40–60% longer than convenience store bags of cubed ice. Hardware stores and restaurant supply companies sell 5–10 lb blocks. Some areas have direct-from-supplier options under $1/lb.
- Insulate the tub: Wrap your tub in a moving blanket or insulated sleeping bag sleeve. This alone can double the time your water stays cold.
- Pre-cool the tub: Fill the tub 30–60 minutes before your session and let the vessel itself cool. A warm plastic tub transfers heat to the water; a pre-cooled tub doesn't.
Use Tap Water Strategically
In many climates and seasons, cold tap water alone hits 50–58°F — in the optimal cold plunge range — without any ice. Check your local tap temperature in winter and shoulder seasons. Many cold plungers skip ice entirely October through April in northern climates. Our guide on cold plunge temperature covers the full range and what each temperature tier does physiologically.
Storage Solutions for Apartment Cold Plunges
Inflatable Tubs
Store deflated in the original carry bag. Fits under a queen or king bed (most bags are 24" × 18" × 8"), in a closet, or behind furniture. Dry thoroughly before storage to prevent mold inside the liner. Takes 5–7 minutes to inflate, 10–15 minutes to fill — low enough friction that it's not a barrier to regular use.
Foldable Tubs
The Edge Theory Labs Ground Tub folds to approximately 48" × 24" × 6" — it can stand upright against a wall behind a door, slide under most platform beds, or lean in a closet. Leave it slightly open when storing to allow any residual moisture to dry.
Stock Tanks and Chest Freezers
These are essentially permanent installations — they stay where you put them. The key is choosing placement thoughtfully: near a drain path, on a surface that can handle condensation, in a location that doesn't make the rest of your living space feel cramped. Many apartment practitioners place them in bathrooms (chest freezers in particular fit in large bathrooms), near the kitchen (easy drain access), or on covered balconies.
Landlord Considerations
Most cold plunge setups don't require landlord approval — you're placing a tub or appliance in your unit, which is within tenant rights in most jurisdictions. That said, a few situations warrant communication or caution:
- Balcony stock tanks or large tubs: If your combined filled weight approaches your balcony's load limit, check your lease or ask building management. Most modern apartment balconies are rated for 60–100 lbs/sq ft; a 100-gallon stock tank at ~8 sq ft footprint is within range but close to the limit in older buildings.
- Water damage liability: If a drain valve fails or an inflatable develops a slow leak, you're liable for water damage to floors and the unit below. Use a waterproof mat under all setups and inspect drain connections before every fill.
- Chest freezers: These are standard appliances. No landlord communication needed. Treat it like a refrigerator.
- Drilling: Adding a drain port to a chest freezer requires no landlord approval (it's your appliance). Drilling into the apartment floor or walls does.
If you're building a long-term cold plunge practice and want to understand optimal session protocols once your setup is sorted, start with our beginner cold plunge protocol — it covers entry technique, breathing, duration, and frequency for those just starting out.
Frequently Asked Questions
Can you cold plunge in an apartment?
Yes. Apartment-friendly options include inflatable cold plunge tubs (like the Cold Pod, which stores flat under a bed), foldable tubs, stock tanks on balconies, and chest freezer builds (which run on standard 110V outlets). The key constraints are drainage logistics and floor weight limits, both of which are manageable with the right setup.
What is the cheapest cold plunge option for apartments?
The cheapest entry point is a basic inflatable tub (Cold Pod, ~$100–$160) filled with tap water and ice. This costs ~$100–$160 upfront but runs $15–30/session in ice costs if used regularly. For frequent use, a $300–$400 chest freezer or foldable tub with a chiller pays off within 3–6 months compared to ongoing ice costs.
How do you drain a cold plunge in an apartment?
Options: (1) Attach a garden hose adapter and run it to a floor drain or bathtub — most practical for permanent setups. (2) Use a submersible pump to transfer water to the bathtub or toilet. (3) For inflatable tubs, tip to drain into the bathtub. Avoid draining directly onto balconies unless your building permits it and the balcony has proper drainage.
Will a cold plunge damage my apartment floor?
The main risk is condensation forming under the tub and seeping into flooring over time. Place a waterproof mat or plastic tray under any cold plunge setup. A filled 100-gallon stock tank weighs approximately 830 lbs — verify your floor load rating (most modern apartments support 40–50 lbs/sq ft; distributed over 10+ sq ft, this is typically fine but worth checking for older buildings).
Do I need a chiller for a cold plunge in an apartment?
Not initially. Ice is the standard approach for inflatable and stock tank setups. However, for regular use (3–5x per week), a chiller unit ($400–$800) eliminates ongoing ice costs and maintains temperature automatically. The breakeven point vs. ice purchasing is approximately 3–6 months for daily use. A chest freezer conversion is the most cost-effective chilled option at $120–$350 total.
Can I put a cold plunge tub on my apartment balcony?
Often yes, depending on your lease and balcony load capacity. Most apartment balconies support 60–100 lbs/sq ft. A 100-gallon stock tank filled weighs ~830 lbs but is distributed across its full footprint (~8–10 sq ft), yielding 83–104 lbs/sq ft — near the limit for some balconies. A smaller 50-gallon tub (~415 lbs, distributed) is safer. Check your lease and consider asking building management for floor load specs.
What is the best cold plunge tub for small apartments?
For storage-constrained apartments, the Cold Pod inflatable tub is the top pick — it deflates and stores flat under a bed or in a closet. The Edge Theory Labs Ground Tub folds flat as well. For a more permanent option with a smaller footprint than a standard tub, the Ice Barrel vertical barrel design uses less floor space per liter of capacity than horizontal options.
📧 Get Weekly Cold Therapy Tips
Join thousands optimizing recovery and resilience with cold exposure.
Subscribe Free →🛒 Top Picks: Cold Plunge Gear
Our readers' most-bought cold plunge products this month.
As an Amazon Associate we earn from qualifying purchases.